Showing posts with label easy dinner. Show all posts

Thursday, August 15, 2013

Summer Soup : Gazpacho !!


It's hot today so I have gazpacho on my mind. In fact I just put some in the fridge to chill for tomorrow's dinner. I also promised my sister-in-law I would post this recipe soon. My brother is growing most of the ingredients in his garden. She got to taste it earlier this week. I made it to take on a one night camping trip we took to watch the Perseids meteor showers at Carrizo Plains.

Here's where we camped.

I knew it would be a warm night so a cold soup was just the ticket. It was !! We did see about a dozen nice shooting stars that night. The next day we headed to Lompoc for two nights with my brother and sister-in-law.

Anyway back to the gazpacho, I did a take off on a recipe by Alton Brown. I have served it several times to guests always with rave reviews. It's great as a starter or for lunch. The combination of flavors and textures are very refreshing.

Great Gazpacho

Ingredients

5-7 tomatoes, peeled and chopped
1/2 red onion chopped
1 cup peeled, chopped cucumber
1/2 cup chopped red bell pepper
1 clove smashed garlic
1/4 cup olive oil
2 teaspoon balsamic vinegar
1/2 teaspoon cumin powder
1 lime or lemon, juiced
2 teaspoons salt

1/2 teaspoon pepper
pinch cayenne ( optional)
5 fresh basil leaves, 1 avocado ( optional)

1) To peel the tomatoes, pour boiling water over them for one minutes, drain and cover them in cool water for another minute or so. They should peel easily that way. 
2) Chop the peeled tomatoes into small chunks and toss them into a bowl.

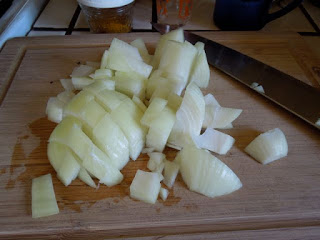
3) Peel and chop the red onion.

4) Peel and chop the cucumber and add it to the bowl.


5) Seed and chop the bell pepper, yes, in it goes.

6) Add the olive oil, lemon juice, balsamic vinegar, cumin, smashed garlic, salt and pepper ( and cayenne). Toss together gently.


7) Remove 1 1/2 cup of this mixture and blend it for 20 seconds in the blender. Mix it back in with the rest and refrigerate for several hours, or overnight, which I prefer.

8) When you serve it, you can top it with a finely chopped fresh basil leaf and several chunks of avocado.

Feel free to add other fresh herbs and spices. The proportions of the vegetables are not that important, use more tomatoes, less cucumber or different peppers if you wish. I do find that letting the flavors marry overnight gives the best results.

Sunday, March 3, 2013

Curried Chickpea Soup


Last weekend I went to lunch with some friends to a delightful mediterranean restaurant called Zameen.
My friend and fellow foodie wanted to try to recreate the chickpea soup they serve there. They call it Moroccan Madness, and when asked the staff said it was flavored with curry, coconut milk and tomatoes.

Here is my attempt, it's very simple to make and very tasty in it's own right.
By the way chickpea and garbanzo bean are the same thing, chickpea has French origins and garbanzo is from Spanish descent.


Curried Chickpea Soup

Ingredients


1 15 oz can garbanzo beans
1 chopped onion
1 tablespoon olive oil
1-2 tablespoons curry powder
1 teaspoon cumin
1/2 teaspoon smoked paprika
1 cup diced tomatoes or 1 small can tomato paste
1 15 oz can coconut milk
1-2 cups water or veggie stock
juice from half a lemon
salt and pepper to taste

You can certainly cook your own beans, I went for fast and easy. I also like the lighter coconut milk.


1) Chop the onion.

2) Saute in olive oil in a large pot.
3) As it softens add the spices, cook for several minutes.
Here is my homemade curry powder !

4) Deglaze pan with 1/2 cup water, working your wooden spoon or spatula to get all the dark bits up.
I had a cup of diced tomatoes in juice from another recipe so I used that.
5) Add coconut milk, tomatoes, lemon juice and the beans. At this point you can save out some of the beans to add back whole later.

6) Simmer 30 minutes.

7) Once the soup has cooled enough, puree adding more water as needed to desired thickness, add back the whole beans to the puree.

8) Salt and pepper to taste and reheat before serving. You can top it with green onions, or some yogurt!


Tuesday, June 5, 2012

Great Hamburgers

With Memorial Day past, it is officially summer even though the Solstice is not until June 22.
Time fro grillin' and chillin' ;-)

I have not been a big fan of hamburgers most of my life. I didn't grow up eating at fast food places and when given a choice as a kid I always picked the hot dogs...
Thus I have not cooked them often...

That being said, I had a craving the other day for a burger and we are lucky enough to have an amazing local butcher just down the street: el Salchichero. I bought a pound of their grass fed ground beef and went about creating my perfect burger.

I did a bit of research here are some random stuff I found:
1) When making the patties don't massage them too much, they are not modeling clay.
2) Don't make them too thick.
3) Make a thumbprint in the center of each one for a reason I don't remember...
4) Make sure the grill is very hot when you cook them.

5) Don't turn them over more than once.
6) Don't flatten them with your spatula.
7) Cook them 5-6 minutes a side depending on the thickness.
8) Let them rest for 5 minutes before eating them, that's hard !!

Here's what I like:
1) Lots of caramelized onions.
2) Whole wheat but still soft buns, lightly toasted...sounds dirty ;-)
3) Goat cheese, this "four peppers" variety was very tasty. Put a slice on each burger after you have flipped it once so that it soften and warms slightly. I find cheddar and other hard cheeses to be too greasy when melted.

4) I prefer my burger without a lot of ketchup, mayo or mustard. They get soggy with too many condiments.
5) And I prefer my greens in a large pile separately.
I enjoyed this burger so much, I know I will be having it again this summer.
It's such an easy weekend meal !!

Thursday, October 27, 2011

Easy Lasagna

Like Garfield the Cat I love a good lasagna but I don't like the hassle of boiling the noodles having them break while they are cooking, then burning my fingers as I try to handle them hot or ripping them as I try and place them into the dish, TOO MUCH WORK !!

I love the "no need to cook" kind of noodle. So here is a simple recipe for making lasagna semi homemade, you can do it all from prepared foods or make any of it yourself. Heck knock yourself out and make the noddles if you like, I am just going to give you the way I did it.
I use no bake lasagna noodles, a jar of pasta sauce, mozzarella and Parmesan cheese and for filling I used roast squash and onions.
I found this summer squash hiding in my garden.

I chopped it up , removing any seeds that were too large, chopped an onion, tossed it all with olive oil and roasted it at 400 F for 45 minutes, stirring it a couple of times. It's the same way I do it when I freeze it.

You can also fill your lasagna with cooked greens like spinach or chard, sauteed ground beef, mushrooms, roasted eggplant, ricotta cheese... the possiblities are endless. In fact my daughter recently made a lasagna without noodles using slices of summer squash and eggplant instead.

This lasagna is best made the day before or that morning so the liquids from the sauce and filling can soak into the noodles.
I start by spraying the baking dish with a little bit of olive oil and a layer of sauce, then a layer of noodles, filling, cheese and more sauce.
Repeat for a couple of layers, ending with noodles and sauce.
Save a bit a cheese for later and cover with foil and store in the fridge until you are ready to bake it.
Bring it out an hour ahead if you can, preheat the oven to 375 and bake for a total of one hour . Remove the foil after 45 minutes and sprinkle with cheese for the last 15 minutes.
It is really best it you let it cool for 15 minutes before you serve it.


 And of course it is great as leftovers !!