Showing posts with label vegetarian. Show all posts

Sunday, February 26, 2017

Tortilla Soup

Several weeks ago I wanted a hearty crowd pleasing soup to serve for a casual dinner. I remembered this tortilla soup but always thought of it as a summer soup, I think because I do love using fresh seasonal ingredients.  With a few changes to the original recipe I came up with a very satisfying dish, I liked it so much I made it twice !! It's a delicious taco in a bowl.


Tortilla Soup ( for any season)

Ingredients

1 large onion, chopped

1-2 bell peppers, chopped

1 bag frozen fire roasted corn*, rinsed and drained ( Trader Joe's has it.)

1 cup finely chopped red or green cabbage

2 cups cooked beans ( black beans, kidney or pinto beans)

2 cloves chopped garlic

1 pint canned tomatoes ( stewed, fire roasted, whatever you like.)

1 quart veggie or chicken or beef broth


1 tablespoon olive oil

1 tbsp chili powder
1 tsp. ancho chili or other powdered chili
1/4 red chili flakes, more if you like it hotter
1/2 tsp. smoked paprika ( optional)
2 tbsp cumin powder
1 tsp. of dried oregano ( sprig of fresh oregano if you have it)
salt and pepper to taste

Toppings
strips of corn tortilla
sour cream
grated cheddar or jack cheese
chunks of avocado
fresh minced cilantro
sliced black olives
salsa
hot sauce
lime wedges

* (If you start with regular frozen corn, it's best to brown it first.)

1) Saute the onion in the olive oil until it starts to brown slightly.

2) Add the garlic, cabbage, corn and bell pepper, cook until soft.

3) Add in the spices and saute another minute or so, to release the full flavor of the spices.

4) Add the tomatoes, beans and broth, simmer for 20 to 30 minutes.

5) Serve with corn tortilla strips ( I found that heating them up first is great) and any or all of the topping listed above.

As with a lot of my soup there is room to modify and adjust to your tastes and what's in your pantry.

Enjoy !!

Thursday, June 18, 2015

Almond spread, what to do with all that almond pulp.

I have been having so much fun making my own almond milk, however once it is made, I am left with pulp...
So far I have made a tart crust and the topping for my fruit crisp. I have also dried it and frozen it to use later.

The other day I decided to try a recipe I found online when I googled "what to do with my leftover almond pulp". It is amazing what you can google these days !!
The recipe called it "versatile almond spread", this is true. We used it with the coconut rice I just posted and as a spread on crackers. I know we could have found other uses but we ate it all !!

If you aren't making almond milk just soak 1 1/2 cup of almonds overnight, rinse them well and use them like the pulp, maybe reduce the olive oil by 1/4 cup, the end result may be a bit softer.

Versatile Almond Spread

Ingredients

2 cloves garlic
6 tablespoons lemon juice
1/4 cup sun-dried tomatoes soaked in water
1 tablespoon Dijon mustard
fresh herbs: thyme, basil, chives, oregano about 2 tablespoons, less if you are using dried herbs
1 1/2 cup almond pulp or soaked almonds
1/2 cup olive oil
2 tablespoons nutritional yeast
salt and pepper to taste


1) In a food processor: the garlic, lemon juice and sun dried tomatoes. Process.

2) Add the mustard and fresh herbs, process until evenly minced. I used a few leaves of fresh basil.


3) Add the almond pulp or soaked almond, process to combine well.
4) Drizzle in the olive oil.
5) Add the nutritional yeast, combine well.
6) The texture should be fairly light and fluffy, adjust with oil and lemon juice.
7) Salt and pepper to taste.
8) Keep in the fridge, they claim this gets better with age, just like me ;-)

Friday, January 24, 2014

Spaetzle! What ? Spaetzle, spaetzle, spaetzle !!

I just love to say the word, spaetzle. There seem to be different ways to spell and pronounce this "small dumpling cooked by running batter through a colander into boiling water". You can find it in the cuisine of Alsace where my great grandfather was born, also in German, Swiss and Hungarian cooking.


I first had spaetzle at a restaurant on Christmas day, it was served with prime rib. Both Genna and I fell in love with it. Within a few days we were trying to make our own.

While the dough is simple, we had trouble with "running the batter through a colander into boiling water". Turns out the key is to grease the colander and have a large enough pot, but I am getting ahead of myself...why do I like it, you may be asking. It's soft, quick to make and soaks up whatever you toss on it. So far that has mostly been butter, garlic and herbs. Bob wants to try it with pesto. In fact he says we should never have to buy pasta again, he says stuff like that when he likes something new.


In my second attempt to make spaetzle for Gina and Taylor, I had yet to read about greasing the colander. The results were rather comical, as I tried to squeeze the dough through the colander and not get burned by the boiling water below. At this point I discovered that there was a tool just for making spaetzle. I know, I know, single purpose tool and all, it sure makes it easy, and it was cheap, less than $10.


Basic Spaetzle


Ingredients
1 cup unbleached flour
1 teaspoon salt
1/2 teaspoon ground pepper
1/2 teaspoon ground nutmeg
2 large eggs
1/4 cup milk
3 tablespoons  butter
2 tablespoons minced fresh herbs
1 clove minced garlic


1) In a large bowl, combine the flour, salt, pepper, and nutmeg.

2) In another mixing bowl or measuring cup, whisk the eggs and milk together.

3) Make a well in the center of the dry ingredients. I never really understood the whole "make a well" concept. Mine doesn't really seem to work well, haha, so don't stress about it.
4) Pour in the egg-milk mixture. Gradually draw in the flour from the sides and combine well; the dough should be smooth and thick.

5) Let the dough rest for 10 to 15 minutes.


6) Bring 3 quarts of salted water to a boil in a large pot, then reduce to a simmer.
7) Spray oil onto a large holed colander or spaetzle maker.
8 a) Hold your colander over the simmering water and push the dough through the holes with a spatula or spoon.

A bigger pot and a greased colander would have made this first attempt easier.
8b) If you are using the spaetzle maker, fill the basket with dough and slide it across the metal grate.

9) Do this in batches so you don't overcrowd the pot. Cook for 3 to 4 minutes or until the spaetzle floats to the surface, stirring gently to prevent sticking. Dump the spaetzle into a bowl.

10) Melt the butter in a large skillet over medium heat with the garlic and fresh herbs.

 11) Add the spaetzle; tossing to coat. Cook the spaetzle for 1 to 2 minutes to give the noodles some color, season with salt and pepper before serving.


Now comes the fun part, what to serve it with !! Here it is with a slow cooked venison shank.
I have also used sauteed mushrooms & onions. Or this lovely deconstructed Beef Stroganoff, which used the mushrooms, onions and small strips of beef sauteed with a dollop of horseradish sour cream on top.
Fresh grated cheese would suffice, as I mentioned we plan to try it with pesto and perhaps a red sauce. Adding herbs and other ingredients to the dough seems be a natural next step. And what about pumpkin spaetzle or vegan spaetzle ?? I will keep you posted.

Thursday, November 21, 2013

Pumpkin Cornbread...yes, more orange squash.

For some reason I am having a love affair this fall with winter squash. I have made it into soup, stuffed it and baked it into cake, cheesecake, and pie. And still I want more...so why not pumpkin cornbread !! Actually, Genna turned me on to this recipe.

With Thanksgiving a week away it seems appropriate. This would be great as a side dish to your turkey day feast, made into stuffing or to go with turkey soup you might be making next weekend. It has a nice spice accent without being too sweet. Genna says to have your butter ready when it comes out of the oven.

Pumpkin Cornbread

Ingredients

1 cup all purpose flour
1 tablespoon baking powder
1 teaspoon kosher salt
1/2 teaspoon ground cinnamon
1/4 teaspoon ground nutmeg
1/2 cup light brown sugar
1 cup cornmeal
2 large eggs
1 cup pumpkin puree
1/4 cup canola oil
1 tablespoon molasses

1) Preheat your oven to 400 F. Spray with oil, a muffin pan or 8 X 8 cake pan.
2) Put all your dry ingredients into a bowl and whisk together.
Note: I highly recommend grating your nutmeg fresh if possible. It comes with outer light coating and a hard outer shell, inside is the nutmeg which grates easily with the micro plane.
Most natural food or gourmet grocery store should carry them.
3) In a separate mixing bowl, add the eggs, pumpkin puree, brown sugar, oil and molasses, beat until smooth.
4) Stir the wet ingredients into the dry stuff and mix until just combined, best not to over mix.
5) Spoon into your prepared pan, I made muffins.
6) Bake for 12-15 minutes for muffins, 20-25 minutes for the cake pan. Do the old toothpick test, if you are unsure.

7) After 5 minutes, remove the muffins to a rack to cool .

 I served them with my curried chickpea soup and Asian slaw.


Friday, August 9, 2013

Quinoa salad, easy picnic fare.


The first time I had this salad was at a picnic with some friends at a goat farm. After touring the farm, we tasted lots of goat cheese, the goat feta was used in this salad.

Quinoa has a slightly nutty flavor and crunchy texture much like cracked bulgar wheat often used in tabouli, in fact this recipe reminds me of the quinoa tabouli salad I posted about last summer.

This salad takes advantage of fresh summer vegetables like cucumber, tomatoes and corn, the walnuts give it an added dimension. It is a very forgiving recipe, feel free to change the vegetable or add more or less depending upon what you have on hand.
It has become a staple in our fridge, perfect for a quick lunch.

Quinoa Salad

Ingredients
2 cups cooked quinoa
1 cup fresh corn or garbanzo beans
1 cup chopped cucumber skinned and seeded 
1 cup chopped tomatoes or cherry tomatoes halved 
3/4 cup toasted walnuts
1/2 cup crumbled feta
1/3 cup chopped pitted Kalamata Olives
1/3 cup chopped cilantro (more or less to taste)

Dressing
3 tablespoon walnut oil
3 tablespoon lemon juice
1 t. dried oregano leave
1/2 t. ground cumin
1/2 t. salt

1/2 t. ground pepper

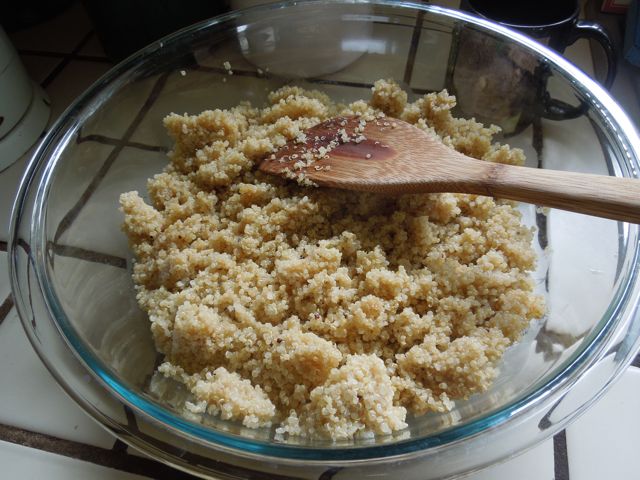
1) Start with the cooked quinoa in a large bowl.

2) Toast the walnuts.


3) Chop the tomatoes, olives, cilantro...


4) Peel, chop and seed the cucumber. As you can see I didn't try to get out all the seeds.


5) Remove the corn from the cob.

6) Chop or crumble the feta cheese.

7) Toss all those ingredient together in the bowl and mix gently.


8) In a small bowl mix together the walnut oil, lemon juice, herbs, salt and pepper.


9) Mix into the salad and serve immediately or allow to chill. 
    This salad can last a week in the fridge.

Tuesday, August 6, 2013

Gina's Beans


Last week on my way home from LA, I stopped in Lompoc to visit family and break up the drive. My brother made a wonderful dinner of carnitas and Gina made beans, from scratch (that is one of those things I wish I did more often).

Turns out Lompoc has their own bean store, which I plan to visit next week !!

Anyway, Gina made these beans from the bean store using their recipe. They went so well with the pork and tortillas, I was inspired to make my own version to serve upcoming dinner guests. I made a couple of the ingredients from scratch which made this recipe more of a process.
You can certainly use canned items and still make great beans.

Gina was kind enough to give me the rest of her dried beans, this her birthday week, so I am naming them after her.

Here's Gina.

Gina's Beans
( I used yellow beans, the recipe mentioned pinquito beans, I am sure pinto beans or even black beans would be great.)
Ingredients:
2 cup dried beans soaked
1 cup tomato puree or fresh tomatoes
1/2 cup roasted green peppers ( or 1 Can (7 ounces) diced green chilies)
1/2 red onion chopped
1 large clove garlic chopped
2 tablespoons chili powder
1 1/2 teaspoon cumin powder
2 teaspoon smoked paprika

1 tablespoon salt

1) Look through the dried beans for any rocks, rinse them, then cover them with water, cover and let soak overnight.
2) Rinse the beans again. Place in a large pot. "Add enough water to cover beans with 1" of water." I wasn't clear what this meant, my beans had a lot of liquid. Next time I will be more careful about this part.

3) Add the rest of the ingredients, cover and bring to a boil. Reduce heat and continue to cook on low to medium heat. Cook beans until soft. Depending on the beans, it will take approx. 1 1/2 to 2 1/2 hours to cook.
Next time I am going to try them in the crock-pot.

I made my own tomato puree from roasted tomatoes.
I also roasted an assortment of peppers.
Here's the red onion.

Here's the finished product.

I served them as part of a taco bar with: corn and flour tortilla, spanish rice, chopped tomatoes, lettuce, and cabbage, grated cheeses, sour cream, black olives, guacamole, salsa and roasted squash.

Whew, it was hard to make tacos that would close ;-)
We were so excited to be eating them that I failed to preserve the meal in photos...oh well.

Wednesday, July 17, 2013

Laurie's Potatoes


That's what Bob said I should call my latest creation. It's a play off my brother's dish which we call Taylor's potatoes.

This is a super simple, easy to adapt roasted potato dish that works well as a dinner side dish or main course or as great breakfast potatoes.

Laurie's Potatoes

Ingredients

4-6 large yukon gold or other interesting potatoes, use more if they are small
1 red bell pepper
1 red or yellow onion
1 zucchini
1-2 tablespoons olive oil
salt and pepper to taste

1) Preheat the oven to 400 F. Cover a large baking sheet with foil or parchment paper, spray or brush lightly with olive oil.

2) Chop all the vegetables into small size chunks.

3) Toss together in a bowl with a tablespoon olive oil. Add salt and pepper to taste.

4) Spread evenly on the prepared baking sheet.
5) Bake at 400 F for 35 to 50 minutes, until the vegetables start to brown on the edges. I like to stir them around every 15 minutes or so to prevent sticking. The time with vary with the size of your chunks and how crispy you like them.

6) Serve immediately and hope you made enough for leftover !!

I served them with grilled salmon and my favorite preserved lemon yogurt sauce.

Feel free to add any vegetable you have on hand, add fresh herbs, garnish with fresh tomatoes and black olives or sour cream.


Monday, June 3, 2013

Asian Peanut Slaw


 The other day I was shopping at Trader Joe's, the "taste of the day" was this Asian peanut slaw, of course it used all kinds of pre-packaged veggies and sauce. It was tasty but I knew I could make it better !! I was lucky enough to have my very favorite sous-chef around to help with this creation.

Laurie's Asian Peanut Slaw

Ingredients

Slaw

8 cups finely chopped or shredded cabbage ( about 1 medium size cabbage)
2 cup grated carrots ( 4 medium size carrots)
1 1/2 cups peanuts
1 cup dried cranberries or golden raisins( my sous-chef hates raisins)
1/2 cup chopped fresh cilantro ( optional but recommended).

Dressing*

1/2 cup peanut sauce
2 tablespoons rice vinegar
1/4 cup canola oil
1 clove finely minced garlic
1 tablespoon grated fresh ginger
1/4 teaspoon cayenne pepper ( more if you want it very spicy)
2 tablespoons soy sauce
1 tablespoon toasted sesame oil

*Note: I made my own. You can use 1 cup of Trader Joe's Spicy Peanut Vinaigrette or something similar.

1) Finely chop or shred the 8 cups of cabbage.

2) Grate the carrots.

3) Mix the cabbage, carrots, peanuts and cranberries together in a bowl .


4) Finely mince the garlic and grate the ginger for the dressing.
5) In a small bowl add the rest of the ingredients for the dressing.

6) Toss the salad with the dressing and serve.


My extremely talented sous-chef pronounced this salad even better the next day when we served it with roll you own sushi.