Sunday, October 30, 2011

The best oatmeal cookies.

I love these oatmeal cookies, they are so chewy and tasty, I think they count as part of a balanced breakfast or lunch ;-)
 I used them recently to make ice cream sandwiches, wow what a great and simple dessert. My poker buddies loved them. I'll post about those later. Let's start with the oatmeal cookies.

Ingredients:
1 cup pecans, toasted and chopped , you can use walnuts if you prefer.

3/4 cup butter, room temperature

1 cup brown sugar

1 large egg

1 teaspoon pure vanilla extract

3/4 cup unbleached white flour

1/2 teaspoon baking soda

1/2 teaspoon salt

1/2 teaspoon ground cinnamon

3 cups old-fashioned rolled oats

You can add dried fruit or chocolate but I prefer them without.
(1 cup dried cranberries, cherries, or raisins or 1 cup white or dark chocolate chips)


Start by preheating your oven to 350 F.

Cover a cookie sheet with parchment and 1 cup of pecans.
Toast them for 8 to 10 minutes.
It's so hard not to munch on them once they are toasted !!
Set those aside.

In the bowl of your electric mixer (or with a hand mixer), cream the butter and sugar until creamy and smooth (about 2 - 3 minutes).

Add the egg and vanilla extract and beat to combine.
In a separate bowl, whisk together the flour, baking soda, salt, and ground cinnamon.
I took this before I added the cinnamon.

Add the flour mixture to the creamed mixture and beat until incorporated.
Stir in the nuts, oats, and (dried cranberries or chocolate chips. )

Be sure to use the old fashioned rolled oats, not the quick variety.

For large cookies, use 1/4 cup of batter (I like to use an ice cream scoop) and space the cookies about 2 inches apart on the baking sheet.

Then wet your hand and flatten the cookies slightly with your fingers so they are about 1/2 inch thick.

Bake the cookies for about 12 - 15 minutes, or until light golden brown around the edges but still soft in the centers.
Remove from oven and let the cookies cool a few minutes on the baking sheet before transferring them to a wire rack to cool.
Have one with a cup of mid morning tea, ahhhh !!

Thursday, October 27, 2011

Easy Lasagna

Like Garfield the Cat I love a good lasagna but I don't like the hassle of boiling the noodles having them break while they are cooking, then burning my fingers as I try to handle them hot or ripping them as I try and place them into the dish, TOO MUCH WORK !!

I love the "no need to cook" kind of noodle. So here is a simple recipe for making lasagna semi homemade, you can do it all from prepared foods or make any of it yourself. Heck knock yourself out and make the noddles if you like, I am just going to give you the way I did it.
I use no bake lasagna noodles, a jar of pasta sauce, mozzarella and Parmesan cheese and for filling I used roast squash and onions.
I found this summer squash hiding in my garden.

I chopped it up , removing any seeds that were too large, chopped an onion, tossed it all with olive oil and roasted it at 400 F for 45 minutes, stirring it a couple of times. It's the same way I do it when I freeze it.

You can also fill your lasagna with cooked greens like spinach or chard, sauteed ground beef, mushrooms, roasted eggplant, ricotta cheese... the possiblities are endless. In fact my daughter recently made a lasagna without noodles using slices of summer squash and eggplant instead.

This lasagna is best made the day before or that morning so the liquids from the sauce and filling can soak into the noodles.
I start by spraying the baking dish with a little bit of olive oil and a layer of sauce, then a layer of noodles, filling, cheese and more sauce.
Repeat for a couple of layers, ending with noodles and sauce.
Save a bit a cheese for later and cover with foil and store in the fridge until you are ready to bake it.
Bring it out an hour ahead if you can, preheat the oven to 375 and bake for a total of one hour . Remove the foil after 45 minutes and sprinkle with cheese for the last 15 minutes.
It is really best it you let it cool for 15 minutes before you serve it.


 And of course it is great as leftovers !!

Monday, October 24, 2011

Honey Ginger Buttercream Frosting


I have had a lot of fun making those pumpkin cupcakes from an earlier post.
When my friend recently asked for something with pumpkin and ginger in a birthday dessert, I decided to make them again only this time frost them with a ginger frosting. I was amazed to find that when I googled "ginger buttercream frosting" there were lots of hits.
This would be great for gingerbread cupcakes as well.

Start with 3/4 cup softened butter. Beat it until it's creamy.

Add 1 to 1 1/2 cups powdered sugar depending on how stiff you want it. Beat on high until smooth.
Now add 1/3 cup honey, 1 tablespoon powered ginger, and 2 to 3 teaspoons fresh grated ginger.
I love my micro grater, just be careful of your knuckles.
The easiest way to always have fresh ginger on hand is to freeze it !!
Freezing  also makes it very easy to grate.

Beat for a few minutes until smooth again and add a teaspoon of vanilla extract.
Mix that in and adjust the thickness if needed.
You can tell from the cupcakes that I used a pastry bag and fancy tip. You can also just frost them with a knife. As a finishing touch I grated some fresh nutmeg onto each cupcake.

Saturday, October 22, 2011

Eggplant the purple vegetable.


I love eggplant, turns out Bob did not. As with a lot of food preferences, it's all about how it is prepared.
Nowadays at the farmer's market eggplant comes in lots of shapes, sizes and even colors.
I try to eat it every week when it is in full season. It doesn't lend itself to freezing or canning, so I enjoy it while it is around. I am particularly fond of the small long eggplants, they work very well in stir-fries.

Here is a very simple way to make eggplant.
I like to pair the eggplant with bell peppers ( I decided to use just the red one). You can see that I cut the eggplant in half inch slices on the diagonal, the bell pepper in inch chunks. Feel free to a summer squash or onions or green beans or any other vegetable that seems to fit.
Here is my wok, we got it at a yard sale still in its original wooden box. I am not an expert but I enjoy what I make with it.

Start by heating about two tablespoons of olive oil at a medium high temperature. Once the oil is hot dump in your eggplant and pepper. I was lazy this time but usually I also add 3 to 4 cloves of minced garlic.

The trick is to keep tossing the veggies around with the metal wok tool.This is not a meal where you can wok away, tee hee.
Once they have started to cook a bit I add my not so secret ingredients.
I add 1 tablespoon sesame oil, 1-2 tablespoons soy sauce and 1-2 tablespoons rice wine vinegar. Eggplants are like sponges, they tend to soak up any liquid you choose to use.
 Keep tossing the veggies.

Don't be in a hurry, it can take the eggplant some time to soften to that nice chewy texture.
I also added a half a block of firm tofu, chopped into cubes.

In the meantime you will want some thing to put the veggies over. You could go the normal (boring) route of white or brown rice or you could try something different.
We love the combination of millet and quinoa.

The millet is on the left and the quinoa is on the right. You can see that they are both the same size and thus cook at the same rate. I use half millet and half quinoa, rinse them first, then cook them in my rice cooker, 2 cups of water to 1 cup of grains. Don't forget to add a bit of oil so it doesn't stick.
It looks like this when it is done.
Test a piece of eggplant to make sure it is a texture you like, then ladle it over your grains.
Feel free to toss on some more soy sauce or chili sauce.
Now Bob loves eggplant !!!

Tuesday, October 18, 2011

Drying Lavender and other herbs.

I grow four varieties of lavender in my yard, mostly for our bees but also for a new product I have been making.
Lavender loves to be cut, the plant does better if you cut it way back as it flowers.
I have found that most herbs dry better in my dehydrator.
I know people may like the look of drying herbs hanging in bunches in their kitchens. You can certainly do that as room decor, however herbs maintain their color, volatile oils and their scent better if they are dried quickly at an even temperature.
Drying in a dehydrator also helps to avoid dust and spider webs on your drying herbs.
Here on the California coast the humidity is so high that herbs will sometimes mold before they can dry.
Use the low setting on your dehydrator and cut the herbs to fit the trays.
Depending on the water content and number of trays, the herbs can take up to a day to dry.
It's a great way to save your extra oregano, rosemary, chives, thyme and basil.

A few years ago a customer asked me to make lavender dryer sachets. She loved the ones she had purchased somewhere and wanted more. You throw them in the dryer for a fresh scent or use them in your drawers, cupboards or closets.

I am NOT a seamstress so for a long time I kept telling her I was too busy ;-)
Eventually three things happened.
1) My stockpile of dried lavender was getting very large.
2) I met a friend who would do the sewing for me.
3) I found all this really fun fabric at a yard sale.

In May we tried our first batch of lavender dryer sachets at the craft show I sell at twice a year. I sold all 35 sachets in two days.


For my show coming up in November I made a lot more and decided to try a rose version made from my little pink climbing rose.

Friday, October 14, 2011

Apple Butter

Apple butter cooking in the oven is such a heavenly smell...Fall is the time of year of apple bounty so if you have never made apple butter it is worth a try.
If you have your own apple tree you are all set or find a friend or neighbor with an over abundance. Just about any variety can work, I used early Gravensteins.
Try apple butter with cream cheese on a bagel or inside your favorite cinnamon rolls !!

Apple Butter- yield 5 to 6 cups

5 pounds of apple, about 20 medium size apples peeled, cored and sliced.
1 cup apple juice or water if needed
1 cup brown sugar
1/3 cup white sugar
1 Tbsp. ground cinnamon
1/4 tsp. ground cloves
1/4 tsp. ground allspice


Place the apples and liquid if needed in a large pot on the stove. Cook until soft. Be sure to stir them so they don't burn. They should take 30 to 60 minutes, depending on the size of your apple slices.


Preheat the oven to 325 F.
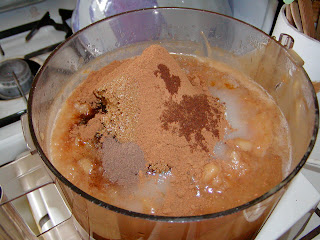
Allow the mixture to cool slightly. Then in batches puree the apples with the sugar and spices.


Transfer them into a large roasting or cake pan.

Stir occasionally  as the apple butter thickens, about 45 minutes.


At this point you may can the apple butter, freeze it or refrigerate ( it will last a month or so).
For canning use a boiling water bath for 10 minutes.

Tuesday, October 11, 2011

Pumpkin Cupcakes...more things to make with your squash puree.

Cupcakes before frosting.

Since I made 12 cups of squash puree from that amazing Blue Hubbard squash I wanted to find more ways to use it.

I decided to make these cupcakes to bring to my yoga class since they had all seen the squash before it's demise. My yoga teacher is a vegan hence these are vegan cupcakes.
I modified a recipe from Vegan Cupcakes Take Over the World. When I first read their recipe I had two major complaints, first off the recipe began with a cup of canned pumpkin...if you must I suppose that can work. There other thing was the addition of chocolate chips, YUK !! Why do people do this ??? Personally I can't stand pumpkin and chocolate together, it's a travesty but again if you must...

Pumpkin Cupcakes My Way !!
Preheat oven to 350 F. Line a muffin tin with cupcake liners.

This recipe makes a dozen but I doubled it with no problem.

Ingredients:
Into a bowl mix together.
1 cup pumpkin or squash puree
1/3 cup canola oil
1 cup granulated sugar
1/4 cup soy milk
1 teaspoon vanilla extract

In another bowl sift or stir with a whisk:
1 1/4 cup all purpose flour
1/2 teaspoon of baking powder
1/2 tsp. baking soda
1/2 teaspoon cinnamon powder
1/4 teaspoon nutmeg
1/4 teaspoon cloves
1/4 teaspoon salt
Mix the two bowls together with a fork not a mixer.
Once they are well combined pour the batter into the cupcake papers.
Bake for 22 to 24 minutes.
When they are done remove to a wire rack to cool completely. Don't eat them warm they surprised me by being gummy until they had cooled completely.
I frosted them with a little cinnamon icing, mix together:
1/2 cup powdered sugar
1/2 teaspoon cinnamon

Add:
1 tablespoon soy milk
1 tablespoon melted margarine
1/2 teaspoon vanilla extract
Mix together until smooth, dribble onto cupcakes with a spoon or use a small plastic bag to pipe it onto the cupcakes in lines or zigzags.


The yoga class were amazed by how good they tasted :-)


Sunday, October 9, 2011

Pumpkin Pie

Winter squash is now in season. As I drive up the northern California coast I see fields of pumpkins of all sizes, shapes and colors. The great thing is that most winter squash make great pies. I have tried butternut squash, sugar pie pumpkins, delicata squash and blue moon Cinderella pumpkins.

Recently a friend gave me  giant blue hubbard squash, I wasn't sure whether to keep it as a pet or cook it up. Unfortunately I didn't take a photo, this thing was huge, probably 20 pounds. Bob even had trouble cutting it up for baking.
Here's a photo I found on the internet.
So after baking it, and making it into puree in my food processor ( sorry I didn't photo document that either), I decided to try it out in pie and cupcakes( I'll post about those soon).
What I didn't use, I froze in freezer bags in two cup portions.

Here's my classic pumpkin pie recipe.

Pumpkin Pie

Preheat oven to 425 F

Prepare your favorite single pie crust in a deep glass pie plate.

In a mixing bowl place:

2 cups  pumpkin/winter squash puree
2/3 cups brown sugar
2 eggs
1 tsp. cinnamon
1/2 tsp. ginger
1/2 tsp. nutmeg
1/4 tsp.cloves
1 3/4 cup whole milk

Blend well.
Pour the filling in the pie crust.
If you have them use a pie crust guard and a drip guard.


Bake for 15 minutes, then reduce temperature to 350 F and bake for 45 to 50 more minutes.
Allow to cool at least 2 hours before serving with whipped cream.
I think pumpkin pie is even better the second day :-)

Friday, October 7, 2011

Roasting Red Peppers

It's finally pepper season around here. They are big beautiful and cheap and I love them.

In order to enjoy them all year round I roast them first.
Like tomatoes they need to be peeled before you freeze them.
Roasting them accomplishes two things it makes them easy to peel and gives them that deep, delicious flavor.

Start by preheating your oven to 450 F and covering your cookie sheet with foil.
Wash the peppers and place on the cookie sheet whole.

Set the times for 15 minutes, check them and turn them.
They will start to blacken, that is what you want.
Check them again in 15 more minutes. You want them blackened on all sides, so depending on the size of your peppers, they may need another 15 minutes.

Once they are done, place them in a brown paper bag or cover bowl to cool.
As the steam from the peppers condenses, the skin becomes easier to peel off.

Then the fun begins.
Peel off the skin...
Pull out the stem...
( you can see I do these tasks while watching football;-)

Remove any excess seeds.

I place whole, peeled and seeded peppers on a wax paper covered cookie sheet to freeze them.
Notice the handsome cat in the background.

When they have frozen, I remove them from the cookie sheet and store them in the freezer in a plastic freezer bag.

I love pulling them out in the off season to add to spreads, stir fry's, beans, pizzas, enchiladas, lasagnas, soups or even marinated salads.

This method works for any type of pepper, green or red, hot or mild.